On December 23rd last year I wrapped nine presents on the bedroom floor, kneeling, with the tape somewhere under the duvet and the scissors in the kitchen. Every gift took two trips. By the sixth one my knees hurt and I’d started using the same strip of tape twice, which does not work, in case you were wondering.
This year I set up a gift wrapping station, and it’s the most useful thing I’ve added to the house since the shoe rack. It doesn’t need a craft room. Mine is a rolling cart that lives in the hall closet, and I’ll show you that one plus two other setups, depending on how much room you have.
What a gift wrapping station actually needs
Strip it down and a wrapping station is four things in one place: paper, the tools, the trimmings, and a flat surface at a height that doesn’t wreck your back. That’s it. Every setup below is a different way of keeping those four together.
- Paper. I keep six rolls now, not fourteen. How I store them so they don’t crush is in my wrapping paper storage post.
- The tools: one pair of scissors that only cuts paper, two tape dispensers, a pen and tags.
- Ribbon on spools, a small bag of bows, tissue paper folded flat.
- Somewhere flat to wrap: the kitchen counter, a folding table, or the top of the cart itself.
The scissors rule matters more than it sounds. When the wrapping scissors live with the wrapping, they’re there in December. When they’re “the good scissors,” they’re in a junk drawer, a backpack, or the garage.
Three gift wrapping station setups, by how much space you have
I tried two of these before landing on the cart. Here’s how they compare.
| Setup | Space it takes | Holds | Best for | The catch |
|---|---|---|---|---|
| Over-the-door organizer in a closet | The back of one door | Rolls upright in the long pockets, tape and tags in the small ones | Apartments, renters, coat closets | You still need a surface, and full pockets make the door heavy |
| Rolling cart | About the size of a laundry basket | Rolls in a tall bin on the side, tools in the top tray, ribbon in the middle | Anyone who wraps in different rooms | Needs a closet floor or a corner to park in |
| Wall corner with pegboard | A few feet of wall and a small table | Ribbon spools on dowels, everything visible | Guest rooms, craft corners, basements | Dust, and it’s on display all year |
The rolling cart (my gift wrapping station now)
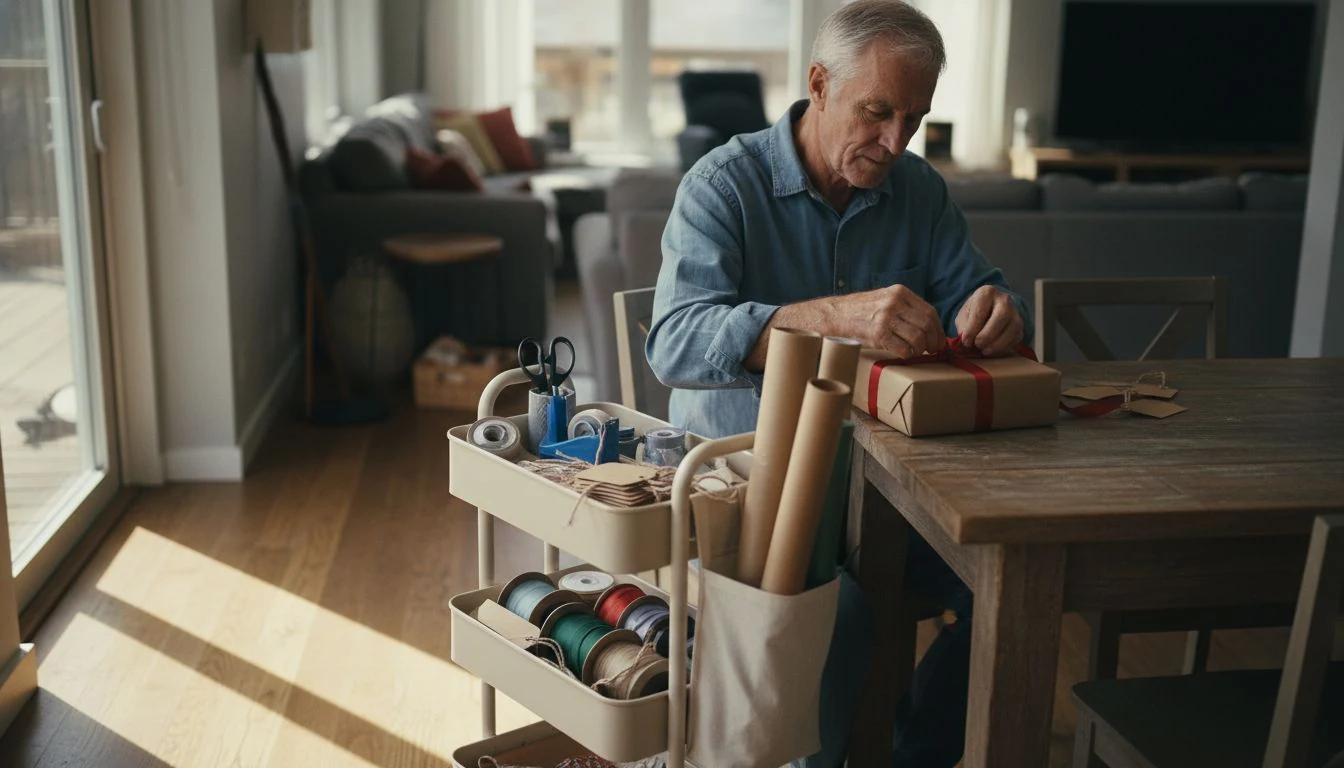
It’s a three-tier metal cart. Top tray: scissors, tape, tags, pens and a small ruler. Middle tray: ribbon spools lying flat and a zip bag of bows. Bottom tray: tissue paper in a file folder so it stays flat, and gift bags folded and standing up. On the side I hooked a tall, narrow bin for the six rolls. In December it rolls to the dining table. In January it rolls back into the hall closet.
The best part is that wrapping happens at table height, sitting down. My knees thank me.
The closet door version
This is what I had before the cart, in our old apartment. A clear-pocket shoe organizer on the inside of the coat closet door, with rolls standing in the bottom row of pockets. It works, and it’s cheap. But I still carried everything to the table every time, and the door stuck once it was loaded.
The corner with a pegboard
My sister has this in her guest room: a pegboard above a small desk, ribbon spools on wooden dowels, scissors on a hook. It’s lovely. It also gets dusty and is out all year. If you have a spare room you’re already setting up, like the ideas in my guest bedroom ideas post, a corner station can share the desk.
Keeping the trimmings under control
Ribbon is where a gift wrapping station gets messy. Loose ribbon tangles, and a tangle of ribbon is how I ended up buying the same red satin twice. Spools solve it. I wind leftovers back onto empty spools or a piece of cardboard and tuck the end into a slit.
If you have little kids, keep bows, small tags and loose bits on the top shelf of the cart, not the bottom. The American Academy of Pediatrics’ childproofing guide lists small objects as a choking hazard, and a toddler can reach a low tray full of shiny things very fast. Ask me how I know.
And plan for the paper after the gifts are opened. Shiny or glittery wrap usually can’t go in the recycling, according to the EPA’s guide to common recyclables. Since reading that, I’ve switched most of my paper to plain kraft and reuse gift bags, which also means fewer rolls to store.
Three gift wrapping station mistakes I made
- Buying the cart before counting. I almost bought a 4-tier one. Count your rolls and ribbon first, then pick the size.
- Storing tape in a drawer “for now.” Tape leaves the station, and you’re back to hunting. Two dispensers live on the top tray.
- Setting it up on December 20th. Do it in November, before the first birthday or holiday gift, so the habit is in place.
What didn’t work for me
Before the cart, I tried an under-bed wrapping box with a lid. Everything fit in it beautifully, and that was the problem. I had to pull it out, open it, kneel next to it, and put it all back. I used it twice and went back to the bedroom floor. Anything that needs a setup step before you can wrap won’t get used in a busy December.
I also tried keeping the whole station in our craft closet. It got buried under school projects by mid-November. If you have a craft closet, my craft closet organization post has the shelf split I use now, with one shelf that’s wrapping only.
Grab the free printable: my Wrapping Station Checklist, with the four-zone supply list, a “count before you buy” sheet and a gift tracker for December. Get the free checklist →
FAQ
What do you need for a gift wrapping station?
Paper, a pair of scissors that stays with the station, tape, tags and a pen, ribbon and bows, tissue and gift bags, and a flat surface to wrap on. Keeping all of it in one place is what makes it a station.
How do you make a gift wrapping station in a small space?
Use the back of a closet door with a pocket organizer, or a narrow rolling cart that parks in a closet and rolls out to the table. Both keep everything together without needing a spare room.
How do you store ribbon so it doesn’t tangle?
Keep it on spools, either the original ones or pieces of cardboard with a slit to hold the end. Store spools flat in a tray or on a dowel so they don’t unwind.
This weekend, gather every roll, every tape and every pair of scissors you own onto one table and count them. Then pick the setup that fits your space. By the time the first December gift shows up, you’ll be wrapping at a table, sitting down, with the tape exactly where you left it.
Get my free Home Reset Planner
The calm, room-by-room planner I use to reset my whole home without the overwhelm. Join the newsletter and I’ll send it straight to your inbox.
No spam, ever. Unsubscribe anytime. — Lena
Keep reading — more on Storage Solutions
Purse Storage Ideas That Keep Bags in Shape (No Dressing Room)
Tool Organization Ideas for a House Without a Workshop
Luggage Storage Ideas for Homes Without a Spare Closet