I own three unopened packs of the same cream cardstock. I bought them on three separate Saturdays, and each time the other packs were already at home in the closet, behind a half-finished quilt top where I could not see them. That is the part most craft closet organization advice skips. My closet never looked messy. I still could not tell you what was in it, so I kept buying things I owned, and the projects I had started sank to the back and died there.
Two neighboring posts here cover different closets, so you land in the right one. If yours holds sheets and towels, that is the linen closet guide. If the mess is really kids’ art supplies mixed in with everything else they own, start with the toy organizing post instead. This one is for the closet belonging to an adult who makes things, and who has the unfinished evidence to prove it.
Jump to:
- Why craft closet organization by material never lasted for me
- Sort by project, not by supply type
- The unfinished pile is the real audit
- Craft closet organization that respects shelf height
- Paper, fabric and paint each want something different
- The buying rule that makes craft closet organization stick
- What I kept and what left the closet
- What didn’t work for me
- Frequently asked questions
Why craft closet organization by material never lasted for me
The tutorials I followed all start in the same place. All the paper together, all the yarn together, all the paint together. That is what I did, over one long Sunday in February, and it looked wonderful for about nine days.
It broke on a small embroidered patch for a jacket. To do that one thing I had to open four different bins: hoop from the top shelf, floss from the drawer, the jacket from a bag on the floor, and the scissors from wherever I had left them, which was the kitchen. Nine days in I stopped putting things back, because putting them back meant four trips.
Sorting by material is how a shop stocks its shelves. A shop is designed for someone browsing who does not yet know what they want. You already know. You want to finish the patch.
A year of this later, my stance is fairly firm: material sorting is the single reason most craft closets fall apart within two weeks of being organized, and it gets recommended anyway because it photographs beautifully.
Sort by project, not by supply type
What actually held was a shallow bin per active project, with everything that project needs inside it. Fabric, thread, the pattern, the half-done piece, the specific needle. One bin comes out, I sit down, and I am working.
I use six bins. That number started as an accident, since six is how many fit across the two middle shelves, and it turned out to be the most useful limit in the whole closet. Six is how many projects I can keep moving. When a seventh project wants to exist, something has to finish or officially end.
Shared tools stay out of the project bins and live in one caddy by the door of the closet: scissors, the rotary cutter, the good glue, a tape measure, pencils. Those get used by everything, so they belong to nothing. I tried duplicating scissors into every bin and it cost me about $40 before I admitted the caddy was better.
Raw stock that has no project yet, the fabric bought because it was pretty, gets one bin and one bin only. It sits on the bottom shelf. When that bin will not close, I am not allowed to buy more of that material. That single rule has saved me more money than anything else in this closet.
Grab the free printable: my one-page Craft Closet Project Inventory, with a row for each active project, what it still needs to be finished, and the date you started it, so you can see where each one stands instead of guessing. Get the free inventory sheet →
The unfinished pile is the real audit
Most craft closet organization guides open with containers. Open with a count instead: pull out every project you have started and not finished, and put them on the floor where you can see all of them at once.
I had fourteen. I would have guessed five. Two of them I could not identify, and one was a cross stitch I remember starting in a different apartment, which means it moved house with me unfinished.
Then go through them one at a time and say out loud which of three things is true. I am going to finish this. I am giving the materials away. Or I am keeping it as raw stock and letting the project idea go. There is no fourth option, and “someday” is just the first option with the deadline removed.
Mine ended up as four finishing, six given to a friend who quilts far more than I do, and four broken back down into plain materials. Four hours, one cup of tea gone cold, and an uncomfortable hour in the middle where I felt like I had wasted a lot of money. I had. Naming it is what stopped the next round of it.
Keep the count somewhere you will see it. That number, not the tidiness of the shelves, is how you know whether the closet is working. Mine sits at six now and it has not gone above eight since March.
Craft closet organization that respects shelf height
My closet is a hallway one, 30 inches wide and 22 deep, with five fixed shelves. Fixed is the constraint everything else bends around, and I could not change it in a rental.
Measure the gap between each shelf before you order containers. Mine go 11, 11, 14, 14 and 16 inches from the bottom, and I bought bins 13 inches tall for the 11 inch gaps. They came back out of the box and went straight back in it.
Depth is the sneakier problem. At 22 inches deep, anything at the back of a shelf is invisible and therefore does not exist. So the back half of each shelf holds only things I reach for seasonally, and the front half holds the six project bins. On the two deepest shelves I put the bins on cheap plastic trays so I can slide the whole row forward, which cost $9 for three and is the best money in the closet.
Eye level goes to the projects. Above eye level goes to light, boring things like empty jars and folded fabric. Below the knee goes to heavy things you can drag out: the paper stack, the paint box. That distribution is the same idea I used for small space storage generally, and it matters more here because craft supplies are unusually heavy for their size.
Paper, fabric and paint each want something different
This is where a generic bin approach costs you money, because paper, fabric and paint each fail in a way the others do not.
Paper wants cool, dry and flat. The Library of Congress guidance on care and storage of works on paper asks for a cool, relatively dry, stable environment, and it specifically warns against rubber bands, self-adhesive tape and paper clips on paper you want to keep. I had a stack of watercolor sheets banded together for two years. The bands had gone sticky and left two brown lines across the top sheet of every pile. Flat in a shallow drawer now, nothing holding them together but gravity.
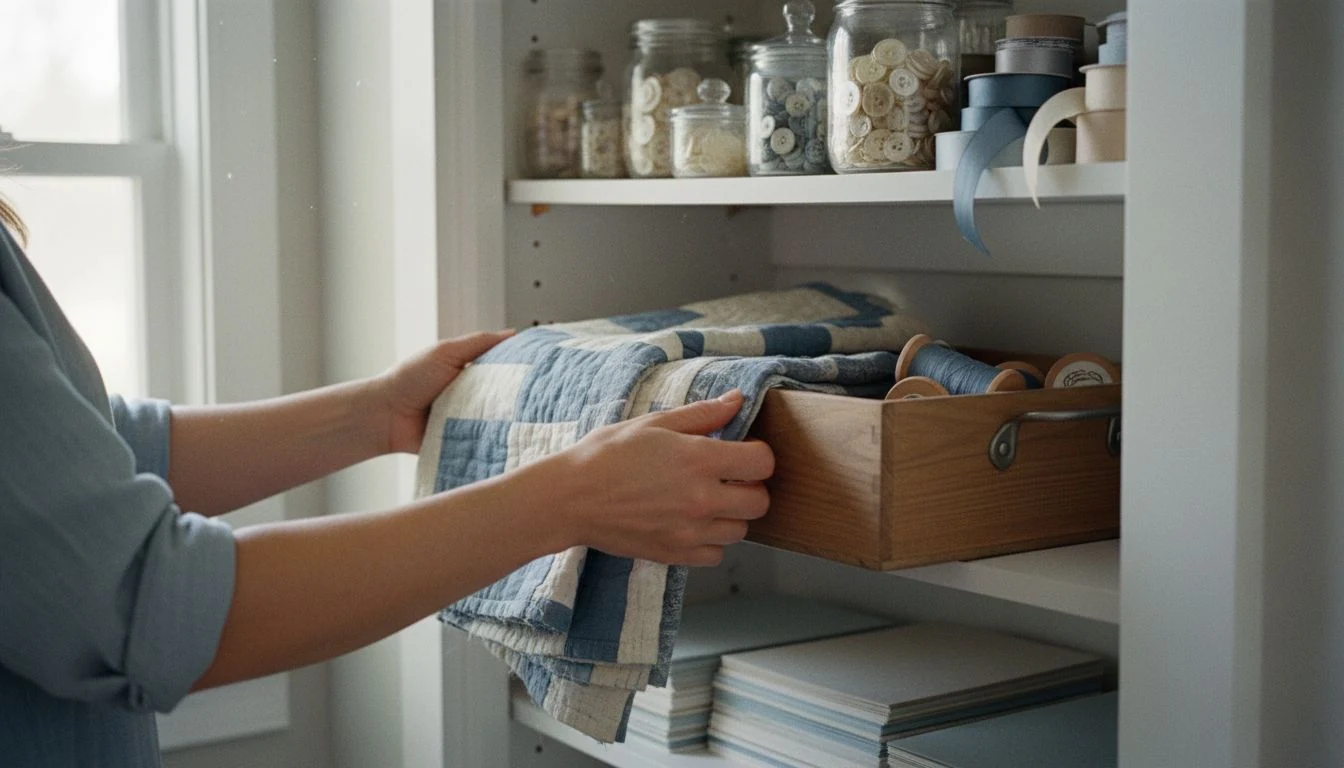
Fabric wants folded on its edge and out of the light. Stacked flat, the piece you want is always fourth from the bottom, and you wreck the stack getting it. Standing each folded piece upright in a bin, like files, means you flip through with one hand. Direct sun fades cotton faster than I expected: a blue fat quarter that sat near the window for a summer is now two visibly different blues.
Paint and glue want their lids down and a date on them. I write the month I opened it on the side in marker. Acrylics that dried into rubber, spray adhesive that went solid, and the mod podge that separated all had one thing in common, which was that I could not have told you how old any of them were.
Old paints and solvents are also the one category you cannot simply drop in the bin when they die. The EPA counts leftover paints and similar products as household hazardous waste, and most areas run a collection point or a periodic drop-off day for exactly this. Mine takes them on the first Saturday of the month, ten minutes away, and I did not know that for four years.
The buying rule that makes craft closet organization stick
You can organize this closet in February and have it back to chaos by autumn, which is what happened to me. Supplies arrive faster than projects finish, and no amount of shelving changes that arithmetic.
My rule now is one new project’s worth of materials per finished project. Finish something, then buy the next thing. The kit I want stays on a note in my phone until then, and roughly half of those notes I never act on, which tells you what the want was actually worth.
The second rule is the scraps jar. Offcuts too small for their project but too good to bin go into one large jar, and when the jar is full nothing more goes in until it has been used for something. Last winter it became a patchwork cover for a hot water bottle. A jar fills up in front of you. A scrap drawer just gets deeper.
Third, photograph the closet with the doors open before you shop, and keep the picture in your phone. Standing in a shop staring at cream cardstock, the picture is what stops the fourth pack, because the closet at home is out of sight and the shelf in front of you is not. It has stopped me twice since March.
If your closet also stores paperwork, patterns and receipts jumbled together, split those out entirely. The paper side has its own logic and I covered it in the home paperwork post.
What I kept and what left the closet
This is the actual sorting I did in February, category by category. The middle column is the one to read carefully. Keeping craft supplies is easy to justify one item at a time, and much harder to justify against a rule you wrote down first.
| What was in there | Kept it if | Let it go if |
|---|---|---|
| Yarn (41 skeins) | Enough of one dye lot for a real project, and I like the fiber. Kept 26 | A single orphan skein with no partner. 15 went to a knitting group |
| Fabric (2 full bins) | Bigger than a fat quarter, or already cut for something. Down to 1 bin | Scraps under about 4 inches. Those went to the scraps jar or out |
| Paper and cardstock | Full sheets, flat, no tape or band marks. Kept about two thirds | Curled, banded, or a colour I bought for one project in 2023 |
| Paint, glue, adhesives | Opens, pours, and I know roughly its age. Kept 11 of 19 | Separated, rubbery, or unlabelled. 8 went to the hazardous waste day |
| Unfinished projects (14) | I could name the next step and wanted to do it. Kept 4 | I could not remember starting it. 6 given away, 4 back to raw stock |
Common craft closet mistakes I made first
- I bought the containers before the audit. Nine bins arrived for a closet that needed six, and two were 13 inches tall for an 11 inch shelf gap. The return cost me $34 in shipping and a fortnight of the boxes living in the hall.
- I made the pretty things visible and the useful things buried. The nice glass jars of buttons went to eye level because they looked good, and the project I was actually working on went low and to the back. I stopped working on it within a month and did not connect the two until much later.
- I labelled by material and not by project. A bin marked “thread” tells you nothing you could not see through the plastic. A bin marked “jacket patch, needs backing fabric” tells you what to do next time you have twenty minutes.
What didn’t work for me
The over-the-door hanging organizer with the clear pockets was the first miss. It seemed made for this: forty little pockets, everything visible. Within a month the heavy pockets had stretched, the door would not shut properly, and anything below knee height was pocket number thirty-something and lost. Small light things only, and honestly it belongs on a cupboard door rather than a closet door.
The rolling cart was the more expensive mistake at $58. Three open trays, wheels, the one I had seen in a dozen craft videos. Open trays collect dust, and craft dust is fibrous and clings, so my floss ended up furry. It also became a surface, which is what happens to flat open things in my house. Mine now lives in the spare room holding plants, and it is much better at that.
Then there was the label maker phase, where I spent an evening labelling containers whose contents I changed a month later. Half of them are wrong now. I write on masking tape instead, which looks worse in photos and has been right every time since.
What I got wrong for longest was treating the closet as the project. It is the room my projects live in, and for a year I judged it by how it looked with the doors open rather than by how many things I finished. Six months of counting finishes has changed what I buy more than any bin ever did. If your making happens at a desk rather than in a closet, the same principle applies to the desk setup.
Frequently asked questions
What is the best way to start craft closet organization?
Pull out every unfinished project first and count them, before you buy a single container. That number decides how many project bins you need, and it is usually two or three times what you would have guessed. Then measure the gap between your shelves, because fixed shelving in most hallway closets rules out roughly half the bins sold for craft storage.
Should I organize craft supplies by type or by project?
By project, for anything you are actively working on. One shallow bin holds everything that project needs, so starting takes one lift instead of four trips around the closet. Keep material sorting for raw stock you have not assigned to anything yet, and keep shared tools like scissors and glue in a single caddy rather than duplicated into every bin.
How do I stop buying craft supplies I already have?
Photograph the open closet and keep the picture on your phone, then allow yourself one new project’s worth of materials only after you finish a project. The photo handles the in-store moment, when the closet is out of sight and the shelf is not. It is the reason I still own three packs of the same cardstock and have not bought a fourth.
How should craft paper and fabric be stored so they do not get ruined?
Paper flat, cool and dry, with nothing rubber-banded or taped around it, since those leave marks that do not come out. Fabric folded and standing upright like files rather than stacked, and away from direct sun, which fades cotton within a single summer. Both do better in a closed bin than on an open shelf, because craft dust is fibrous and settles into everything.
Count your unfinished projects this week before you tidy anything. That one number tells you how big this job actually is, and it is the only measurement in the closet that has kept me honest. Mine was fourteen, and I would have sworn it was five.
Get my free Home Reset Planner
The calm, room-by-room planner I use to reset my whole home without the overwhelm. Join the newsletter and I’ll send it straight to your inbox.
No spam, ever. Unsubscribe anytime. — Lena
Keep reading — more on Home Organization
Storage Unit Sizes: What Actually Fits in a 5×10, 10×10 and 10×20
What Professional Closet Organizers Actually Cost (and the Session I’d Book First)
Organize Closet by Color: The System That Holds Up (and Where It Backfires)